(Classic “fitting” shot on my new-to-me Quintana Roo Seduza! Although the two main components (the bike and the jules) in this picture appear to be normal sized, it’s just an allusion; we’re just both mini. 🙂  More fun (funny?) pictures follow…)

As many cyclists and triathletes will admit, a professional bike fitting can ostensibly seem to be a big, unnecessary cost. We will also admit, that’s just not the case. Professional bike fitting is a bit of a nebulous term– the costs range dramatically between bike shops (and friends who know bikes “real well”) and the actual service itself ranges as well. There isn’t one, best way to ensure a great fit for a new or even old bike. That isn’t only because each person’s shape and flexibility is different but when you add the complex geometry of the bike, the differences between cyclists is exponential (or factorial, actually). I think women might best understand this by thinking about the ways that clothing fits… or doesn’t… even if technically a size 6 should just be a size 6, right? Yeah, I know, never that simple. Guys- your clothing is ridiculously simple so the analogy stops there.

Why get fit? A proper fit bike will make your time on the road and trail (or the race course) more enjoyable and maximize efficiency. Whether it’s a new or old bike, you could probably benefit from finding optimal riding position (even if it’s just YOU who’s changed and the equipment is the same). If that weren’t enough reason, a “fitting” is the type of initial cost that has a long term benefit in injury prevention– and let me tell ya– nothing is worse than being a sidelined athlete. Often things such as: saddle sores, sore knees, tweaked hips, lower back aches, shoulder strains and neck soreness are directly related to your bike fit. I don’t want to overpromise here (note: I’m not even a good cyclist let alone an actual bike fitter!), but I have also read and heard that a good, tight fit on the bike can lead to an overall increase in output by 10% (I presume this is talking about wattage). So, to recap you might consider a bike fitting if you’re a) new to the bike, b) dislike being injured, c) want to increase cycling efficiency or d) want to be faster. If you want none of these? well, you’re probably not reading this blog.

What is involved in a bike fitting? That depends.

1. The basic fitting: although it might vary a little from shop to shop, for the most part the basic fit will analyze the following:

  • Pedal-shoe interface (yep, this is actually variable      and can be optimized based on your quad/hamstring flexibility)
  • Seat height (fore/aft)
  • Cockpit sizing (handlebars, brakes, gear components)
  • Bar/stem height, length, rotation
  • Handlebar placement
  • Aerodynamic position
  • Proper Pedaling Mechanics–how to effectively pedal, so      the power will be transferred to the pedals.

Cost? Usually around $80-100. OFTEN this will be included in a bike purchase! So make sure to ask. It might be discounted if you spend some money on gear and equipment too. I’d say this is basically mandatory for anyone getting a new bike, but possibly insufficient for a seasoned cyclist looking to ameliorate aches/pains or improve pedal-to-power stroke.

2. The mid-level Option: The mid-level bike fitting is also completed by professional bike fitter. This fitting not only measures everything from a basic fit, but in addition adds in aspects of motion, flexibility, and angular momentum. Specifically, a professional fitter will look at your overall movement on the bike to see where you might have muscle imbalances (or flexibility differences), mobility, stability and strength (specifically core!) that will contribute to a great fit versus just an “ok” fit. These fittings span the gamut for price- you want to make sure this is going to be at least an hour’s session and just ask the bike shop what the fitting includes to make sure it’s really getting into the nit and grit of your cycling. The average costs I’ve seen? $150-$300. Communicate what you need and what you’re looking for and you’ll find that either a higher cost is justified (is the fitter recording the stroke and analyzing dynamically? might be worth a little more because then YOU get to see what he/she does!) or it’s a lower cost with less frills (just some extra expertise and dynamic analysis).  Either way, I’d actually say this is worth it if you’re going to be cycling more than once a week– no matter the distance. If you’re getting on your bike that consistently, a bad fit will be contributing to overall pain in other parts of your life. And why invite that? No need for discomfort (well, no more than what happens in daily, grinding workout sessions of course).

3. The High-Tech Option: There are really high tech fittings; these include clipping into your bike in a way that not only measures your power around the pedal stroke (watching for inconsistencies, or where the “waste space” of your pedal stroke is) but in addition this allows a sophistacated software system to understand where your flexibility is insufficient and should be “supplemented” by your position. The software/hardware combination does this by measuring the weight the foot is carrying around the stroke. Then in addition, they include the bike mechanics measurements included in the basic and pro fittings as well. These are completed by a professional bike fitter (certification is pretty stringent) and can run over $300 per hour. Yep, I know… that’s kind of pricey. Honestly, this isn’t money I (personally!!) would spend. This is because I know I could get a great (albeit slightly less fancy) fit for less, but also because I’m not talented enough to benefit from the delta in price (meaning, I might as well use the extra $$ to race some TT events and improve my handling). If you are a good to great cyclist– this might be a fun opportunity to explore your inefficiencies and improve your cycling in a way you are less likely to by cycling through the same motions that you have for multiple seasons. Fewer places offer something like this though, so it’s usually worth a quick google search (Aw, I know, you just wanted an easy link right? try this: http://ww1.lmgtfy.com/).

I have been incredibly fortunate to be introduced to a fantastic cycling couple– Don and Elaine Vescio who run the triathlon center VMPS, which I’ve mentioned before. Don and Elaine led computraining sessions I took part in all winter; they analyzed my pedal stroke, they told me to stop pedaling a bike that was too big for me, they let me borrow a bike when mine was stolen!, and have been incredible mentors in all things triathlon. In addition, Don helped me not only pick the bike I so badly needed in order to train and compete (to replace my sad stolen TREK) AND helped fit me to the bike. In fact, we are still working on optimizing the fit and the components to suit my exact needs! It was a laborious effort on Don’s part– it’s definitely a pro-fitting (and beyond, really), which he offers anyone for a very very reasonable rate and the time and care and expertise that he has are worth much more. And because we were having fun– we took some pictures! Good fit, right?? Pretty aggressive and tight and I’m lucky to have the flexibility for it (or so we hope!). I’ve only clocked ~100 miles on her, but I’m happy so far!

Tell me– what’s your experience? Is the bike fitting worth it? Are there tell-tale signs of a successful fitting? Any requests you’d make specifically to improve a fit?

Adult [SWIM] Toys

Posted: April 19, 2012 in Swimming, Training, Triathlon

Oh, did I pique your interest? Yeah, I know my audience 🙂  Some tweeps have asked me to write a little about my personal opinion on swim toys– that is (in my mind): kickboards, pullbuoys, paddles, resistance bands, snorkels and floaties.  Wait, you didn’t mean floaties?  Well, I love them; I think you should wear them all the time.  Like this guy!Image

He’s the coolest. You want to be like him.

Ok, sorry, a little punch-drunk this morning.  Back to the actual tools you might use in the pool.  I should preface this again, as usual, by saying, I am by NO means any kind of expert. I’ve swum a bunch and have opinions like any person who spends too long underwater in their own head.  So here are my thoughts:

Kickboard: No go. These make a lot of sense when you’re a youngin’ learning how to kick and holding your breath is already a big stretch.   But it’s NOTHING like the real thing- whether swimming in a tri or swimming for cross training, the harder thing to do is to use your core to keep your hips lifted in the water and your feet kicking at a steady tempo.

Pullbuoy: Sometimes. I think there are better tools, but when you need to isolate your upper body it is VERY tough to do that without some kind of mechanism tying your legs together.  If you don’t use something, you probably ARE kicking even if you think you’re not. The slightest kick helps keep your body afloat and balanced and it’s incredibly hard not to do.  So, if there is a pulling set, use something– if you don’t have a resistance band or a resistance band pulls your legs down (see below), by all means, use the buoy. No, it’s not race simulating, but to be honest– a wetsuit is very buoyant so it’s not far off either.  It’s better practice to isolate your upper body, keeping yourself on the surface and using good form than to let the legs sink forming a pike in the water. (ok this isn’t the best picture, but perhaps it’s a little illustrative of the point. Also, don’t pick your head out of the water like a puppy… puppies are cute, they aren’t fast).

 Image

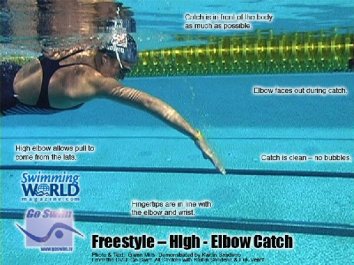
Paddles: Maybe. So, I don’t use these.  But I absolutely understand their purpose and I think it’s valid for many athletes.  First and foremost, it’s a great strengthening mechanism. These work not only your posterior and anterior deltoids (hot hot sculpted shoulders anyone?), but with a nice long “catch” out in front of the stroke (and making sure the hand is entering just within peripheral view), you will work your lateral muscles and triceps (sexy fast back and arms).  Does that description make sense? The ‘catch’ is SO important when you use paddles, otherwise, you will likely end up injuring yourself for no good reason.  The best “catch” with paddles is to aim to keep the upper arm (think: keep elbow up!) towards/parallel to the surface while the flat palm pulls back toward your body.  This will WORK your triceps and especially hard with paddles but so good for you! The picture shows a great setup, just before the “pull” which will be led by the forearm, not the upper arm!ImageI want those hot long arms 🙂

Resistance bands: YES.  These can be used in 2 ways– pulling is the first.  Take a resistance band (circular, not a long band) and put it around your ankles.  If you can swim that way for 100, great. If you can do 10 x 100? without compromising your good, body position? Awesome. I really support using these. But if your legs slouch because your core isn’t used to holding up your legs– don’t use this.  Instead, practice holding your legs up on your own– no buoy, no kick– just core.  Your abs will feel it and you will get stronger just trying to keep those legs afloat.

Stretch cords: The OTHER way to use “resistance” is by using stretch cords.  I LOVE these. You can use these anywhere! Pool or not. You will get lots of benefit from these: strength and technique chief among them.  For you “non-swimmers” out there– try these out!  Here are a few of my favorite exercises with stretch cords: thread the cord (or stretch band, nothing fancy, but needs to be a little long) around a banner or secured bike rack, something stable.  Then take each end in each hand and hinge at your hip with both hands stretched out above your head. Find tension in the cord in each hand (equal on both sides), and pull the bands down in that “catch” shape– high elbows, hands and forearms pull down, bringing hand directly below elbow, and repeat. This picture helps (the one on the left is better): ImageA next step is to pull all the way through, with a nice strong “finish” to your hip.  That finish isn’t really something that directly translates into your stroke in the pool– you actually want to exit the water AT if not just before your hip and not pull through to a straight arm.  But it’s a nice tricep strengthener if you want that.

Snorkels: Can someone else comment here? I had NEVER seen these used before this year. And now they’re all the rage… in swimming pools… Ok, I DO understand that you’re probably not comfortable with breathing and that can have deleterious effects on your swim stroke.  However, you have to BREATHE in a race. You have to get over the difficulty that is breathing.  So, sure, you can use a snorkel when you want to simply focus on improving your technique for drills in the pool.  But don’t come to rely on it!

Ok, so there are some tools for thought. What do you think? What toys do you use? What do you love? What did I get wrong here? What would you add?? I’d love to hear your thoughts!

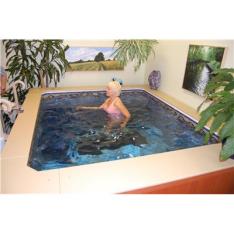
Firstly– to my many friends and teammates who offered support and advice on my “awesome” aqua yogging experience, thank you!!  Check it out.  It’s what cool injured athletes do!

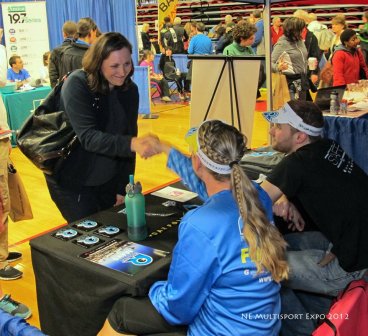
So this is just a quick post to recap the fun times had at the Boston Multisport Expo held a few weeks ago.  I attended the fun (and free!) expo on behalf of both teams I’m lucky to be part of– my local multisport team is Wheelworks Multisport and my national team is Rev3 Triathlon.  For the most part, I was there to help spread the word about the AWESOME northeast races sponsored by Rev3 this year– one is the June 2-3 festival in Quassy, CT (which I’m doing, hooray!) and the other is in my old college (ish) stomping grounds of Maine!!  Old Orchard Beach is a really fun, scenic area and I’d encourage anyone to try this out– there’s even an all-women’s portion of the Olympic-distance race!  I’ll definitely be at the race, still determining if I’ll be racing or volunteering.

When I wasn’t repping for my teams, I was cavorting with my awesome Rev3 and Wheelworks Teammates!  Jordan, Jen and Jamie are all really talented, motivating triathletes. Triathlete or not, you should check them out!  Their blogs are witty, honest and inspiring.  Look how professional they are:

Next year– you should go! I had several friends attend– some have never done a triathlon and it’s fun for everyone.  Great swag: Powerbar, NRGbar, Sports-type detergent, race entries, bike tuneups, and… really fun team events!  There were talks and clinics too! I missed most of those– sadly– but Mark Allen spoke about Half Ironman training necessities and taught a swimming clinic, which I heard was really well done for coaches and athletes alike.

So the other neat part of the day was the team “tri” competition. Wheelworks Multisport put together 3 teams of 4 people each to compete in the three events, which were: a 5k run, a 10k bike time trial and a 300 yard swim.  Our 5k-ers were amazingly quick, with one team member coming in 2nd overall woman with a 17m 5k.  Yeah, that’s right, SHE is really fast 🙂  I’m not totally positive about all our bike times, but they were good!  It’s really competitive especially for the run and bike.  I, with my sad broken ankle, decided on competing in the swim with Brendan, Rachel and Emma! Here is my wonky, broken ankle start:

Our team ended up 3rd overall in the swim, 8th overall with all sports combined.  But I was super psyched to learn that I posted the fastest female time! Wooo, fancy! I won a TYR transition bag! Thank you Boston Multisport!  The swim itself didn’t feel great— my breathing was off, I was nervous around the walls (I wasn’t pushing off my left ankle, so there was NO reason to be nervous) and overall I think I had just gone in and out of a good warm up zone. Not to mention– they were “counting” for us (and failing I might add, yes, that means the counters MIS counted), but even they were told to keep the counters OUT of the water.  When I asked “WHY” on early they would do that, my timer sniped back, “You’re triathletes, just sight!”  She meant– just lift your head up, 5 feet from a CONCRETE wall to read a number. For the record, this is NOT what happens in triathlons.  In a tri, your sighting is done 100 yards away (give or take, and you’re simply looking for a COLOR– a SPOT on the horizon (also known as a “beacon of f*%#ing hope” depending what kind of swimmer (or lack thereof) you ask).    Nonetheless, I was psyched to be part of the team– I love relays and we really had a good, relaxed time competing.  My time was a 3:24 which should mean nothing really– it’s a 300 yard swim– what is that distance?!  Next time I’m hoping we could do a full “normal”  500 yards, but apparently triathletes dislike this concept.

The multisport community is pretty amazing. Whether you’re new, or just an occasional visitor to triathlon, or simply just like to cross train– it’s a really inviting warm community.  I say this because my AWESOME friend Joe of 1BandID (GET ONE, they are AWESOME!) invited a big group of us amateur triathletes out with him AND Jessi Stensland— yep, that one.  She’s a rockstar PRO Triathlete currently owning the XTerra Circuit of triathlons.  She spends her days traveling the world, spreading good will and competing in triathlons. Totally inspiring. She was in town to give a dynamic body work seminar- which I’ve heard GREAT things about.  To take your body and your ability to the next level– I’d highly suggest checking out her company– MovementU.

Take home lessons: Come to the Multisport expo in 2013! And, Multisporters are incredible people. I love this community and feel so good being part of it.

Anyone else agree? Thoughts on crazy triathletes? Do you like these kind of expos? Or.. not? Find anything cool or unusual if you did attend Boston’s?

As most people know, I haven’t been running, cycling or being a real triathlete these last few weeks.  As a little update– my silly boot has stuck me in the pool almost every day for 14 days in a row!  NUTSO.  I swam 28,000 meters in about 8 days.  Obviously, this just isn’t sustainable.  And I’d know, I do sustainability professionally…. no wait… wrong one.

Anyway, my coach added something to my schedule that he called, “pool running.”  He seriously underestimate my capacity for this weird, new activity– as he instructed me to “just strap on the running belt and run the intervals.”  Oh, yes, just … strap on.. wait, what?! Strap something on in the pool? This former (past life) swimmer girl stopped in her tracks. It’s not that I’d never seen people doing this activity, it’s just that… I thought it was minimum age 60.  Oh how very wrong I was.  My first time aqua jogging was hilarious.  I had a set of 5 x 3 minutes with a nice long warm up and cool down.  I thought, “well, this will be easy, maybe too easy.”  HA.  Wrong yet again.  I worked my buns off… not literally (glutes have purpose, I swear!).  I don’t know much about my heart rate data, but I do know that I was working it– and doing my best to ignore how ridiculous I looked.  But at some point I couldn’t help thinking, “this isn’t running; hell, this isn’t even jogging.  This is awkward… yogging.”  A la Anchorman — yes that is an urban dictionary link.

Seeing as I have had NO clue how to do this… these have been my own self-developed ‘strategies’ for, well, trying to move forward:

1. Feet off the ground (thinking about nearly-missing the bottom); skip the shallow end.

2. Pull my knees up, keep up the cadence… (that’s clearly a relative metric).

3. Arm pump is ok, as long as it’s NATURAL.  This is not sculling practice!

The best way to show the “look” of this activity might be the “What people think I do” meme.  Yes, go see that link, the whole post will make more sense if you do 🙂  This is my best attempt:

When I say I’m “Aqua Jogging”:

What my friends think I’m doing:

Image

What my Coach thinks I’m doing (great form, so angular and tall…):

Image

What it feels like I’m doing (come on! I’m wearing a floating device!):

Image

What I’m actually doing (wait I’m supposed to be moving… forward?):

Image

Motioning a whole lot… and not. going. anywhere.

So far, This is my Awkward Yogging.  Clearly this is NOT a ‘how-to’ post– more of a “HOW DO YOU DO THIS?!” desperate plea for help 🙂  Any thoughts? Hints? Strategies? 

Today I’d like to chat about Flip Turns.  But for full disclosure I should first mention that one of my flip turns has resulted in the following hott look:

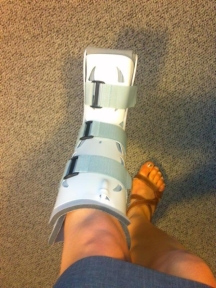
 Yes, that would be the HIGHLY fashionable “Stormtrooper v6” boot.  It’s so a la mode, right?  All the cool kids are getting them (Get better quickly, Kacie!).  Granted, Kacie is a rock star.  She ended up with not 1 but 2 stress fractures and has a good excuse!  That girl just completed a 2X Ironman.  Yes, you’re reading that right.  She completed a race consisting of 4.8 miles of swimming, 224 miles of cycling and 52 miles of running.  Yes, insane, but also bad ass.  She has a great Q&A post about it herebecause I know you were wondering which flavor of poptart she uses 🙂  #BreakfastofIronmanChamps.

So, back to the issue at hand.  Flip turns.  As I mentioned I managed to break my ankle doing a flip turn in… wait for it… January?!  Yep, that’s right.  2 months ago, I did 2 things that put me in a boot today: 1. I flipped HARD into the wall– not into the water and OFF the wall, but INTO the wall and 2. I kept working out on the ankle assuming it was just a bone bruise (because honestly, who breaks a BONE in the pool? this girl, apparently).  In any event, this is all to say- flip turns are NOT evil and that’s coming from a girl who would happily claim otherwise right now 🙂

Before I get into my mini tutorial on how to do a flip turn, I first want to say– first, practice your flip turn AWAY from the wall.  Do them in the middle of the lane, try switching direction quickly, it’s great practice.  Second, find your place by watching the bottom of the pool, looking up at the wall will slow you down a lot and trust yourself, keep practicing your orientation; thirdly, don’t be timid.  Yes, you can hit your feet, your ankle, etc… but it’s very rare, you are MUCH more likely to be too far than too close ever.  If you want to  improve, practice makes perfect, so strive for a great turn on EVERY wall during your practice!

Flipturns: A Tutorial for a fast flip:

1. Body position- Going INTO the wall, you need to prepare your body to wrap around the turn.  The best way to do that is to feel your horizontal body line tilt down at the chest, just a tiny bit.  By thinking about pressing the weight your chest down a little towards the bottom of the pool, you’ll be able to get your head sunk a little lower than the surface of the water.  Do not tuck your head or arch your back, but rather feel as though you are leaning toward the bottom of the pool- chest first, sinking your upper body beneath the surface and feeling your shoulder socket stretching a bit as you keep your arms moving in the same place along the surface (yep, better work on that flexibility!).  This shift in your chest will only result in about a 2 inch, or 4 cm difference- that isn’t a lot! Don’t dunk yourself. Swim into the wall, sink the chest, which will THEN allow you to tuck your head at a spot lower than your body, which enables you to engage your abs to PULL you legs over top, instead of bouncing up and over the surface with your head and body. Many people think the flip is like a jump into a tuck just before you hit the wall.  I’d argue that it’s more like quick origami fold in your body to wrap around the turn, instead of a gymnastic bouncy ball at the wall.

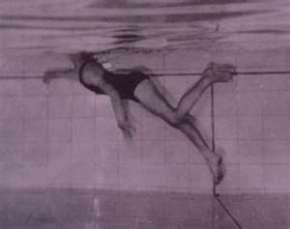
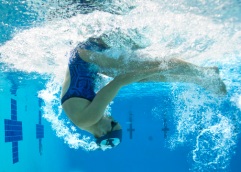
2. Tight tuck/fold:  Rather than thinking of the flip turn as a big awkward ball, I think of the flip as I said above- a quick fold in the body to switch directions as quickly as possible.  Here is a pretty good picture of what I mean– notice her head is down, face looking towards knees and legs are not shooting up above the water line, but are smoothing following her body flat around the turn.

3. Feet PLANT: Aim your feet toward the wall- smoothly draw them (with your ABS!!) over top of your head, along the water line (not up and over!), until they meet the wall.  At that point, plant the balls of your feet solidly so that your toes are up.  As you practice, this might change to the SLIGHTEST angular change- 11 o’clock or 1 o’clock depending which direction you turn, but my advice is to practice the fastest turn possible to get OFF the wall, which lands your feet with those toes up.  Your legs do not need to be right next to one another– in fact, they shouldn’t be.  Space your feet about hip width on the wall to generate the most power– think of it as you might a solid squat in the weight room.  Your hips are already naturally down (as they would be seated ‘back’ in the weight room), your back should be flat, parallel to the surface (flat back in a squat) and with your feet separated from one another, you’re prepared to essentially perform a squat jump off the wall.  Mary Eggers is about to take on LANCE (Armstrong, y’all) in a swim race and here she is demonstrating AWESOME positioning off the wall:

4. Tight streamline: The streamline off the wall might be the most important part of the flip turn, the place where you could gain or lost the most time.  Notice in the Mary Eggers picture, she notes that her arms are already in the right position before she takes off- that is crucial!  If your arms are loosey-goosey, they are only hindering your hydro-dynamicism (creating drag)  coming off the wall.  When you get your feet planted on the wall, think about forming the tightest line possible, from hands to feet.  That means, pulling those arms tight above your head, straighten the arms, tucking the head right between the arms (no tucking the head up or leaning it back), engage the abs and the glutes and… launch!

Altogether: Consider looking at the body from the side, optimally you would see: 1. flat horizontal line 5-7 feet from the wall, then the same tight line in the body but upper body tilting beneath the water (3 feet from wall), then the head tucking around, pulling your legs straight over your head into a pike at the wall (knees as close to face as possible) then quick bend at the knee at the last minute to plan the feet on the wall, toes up, hands overhead in a atreamline position, ears tucked beneath straight arms, feet apart, and LAUNCH!

When I hurt myself, I did a few things wrong.  I turned onto my side before the flip was complete- so my feet were never going to get to the right position on the wall, with toes UP.  However, I was doing a few things right too because it’s tough to crack your bone– my tuck was tight, I had a lot of speed.  Don’t use your flip turn as a chance to slow down and rest- it’s just a change of direction, unfortunately necessary in these little pools!  So, take advantage- swimmers and triathletes alike, just because you might not perform one in a race doesn’t mean there isn’t a fitness to these- don’t let your heart rate drop by using these as rest, think about how they can boost you for the next 25 yards or keep you up to speed when your technique starts to falter.

I clearly am no expert- but I love doing flipturns.  Any other advice you can think of?  How do you use your turns- for a little boost? or a little rest?

OK, maybe ‘math’ is a bit strong.  Maybe I should call this a “mental breakdown” but sounds really bad, right?  Right.

In my mind, when races, events, or training sessions get long, I need to start breaking them down.  In fact, if I don’t, I find that I just inevitably start to slow down and lose steam.  And well, that’s no good, right?  As it turns out, most of that slowing down is really mental, much more than physical.  Seriously, ask my spin class.  They’ll tell you that with a little gentle… “coaching” they maintain much more effort than they might otherwise.  So, in a race, I turn that coaching in on myself.  That way, I’m busy not only NOT thinking about how “hard” the event is (because what is the use of THAT mindset? OF COURSE it’s hard, why else do it?), but I am also able to concentrate on a pattern, or a way to keep my speed up beyond trying to envision how to make my muscles ‘just go faster.’  While I was home, I swam an annual Pittsburgh Meet where EVERYONE swims a 1650.  It’s kind of neat actually.  (ok, some of you are bored just THINKING about it, but let me explain.)  The Masters swimmers in Pittsburgh are a really active, engaged bunch who love things like this– it’s a reason to get together, test your fitness annually, and see some really fast swimmers, and a whole host of not-so-fast- but still incredibly motivating people swim the same event.  This year there were possibly 10 or 11 heats?  It was incredible.  In fact, because the network is so friendly, I knew a swimmer in just about every heat! That’s just from my parents swimming on Masters teams!  (and with me occasionally joining them when I’m home!).

There are, of course, a variety of ways to approach a long race or long training session for that matter.  This isn’t to say I’ve got some ‘right’ idea, by any means. In fact, when I posted on the twitter about this, I got several responses- from doing a 2 mile race “as fast as possible” from a seasoned triathlete – practicing speed and tempo, to “slow and easy with a fast sprint for the last 100” for a swimmer in a 1650.  My mom swam this with me and WON her age group!  Her mental breakdown was: 1 x 150 warm up, then 3 x 500, each one a little faster than the one before.  That PLUS a Powerbar Gel 45 minutes before her race gave her a 30 second PR!!

GO MOM!!!  (Yes, we are wearing MATCHING Steelers Swim caps)!! (And that is my sweet new Rev3 Triathlon training suit! I like it; it shimmers…)

My 1650 mental breakdown:

For full disclosure: I had NEVER swum this before- not in a pool or race anyway- so ANY time would have been a PR.   I didn’t have any time increments in mind, this was all completed by “feel.”

400 Setup: I wanted a cruising pace that felt a little ‘too’ slow in the beginning, like I was holding back just a bit.  No big kicks, just strong through the water and really focusing on form, breathing and good streamlines off the wall.  My breathing was every 5 for 100, then every 3 for 100.

2 x 200: These were done as pickups– so I thought of them as “builds” but no major speed work, just constant increasing in effort and yes, I did allow myself to take the edge off when I started the “second” 200 here.  I was feeling quite fast and possibly unsustainable by the end of the first 200 so I needed to make sure I kept it all under control.  The form, breathing and streamlines were still maintained (yep, every 5, every 3 by 100)- each of these was intended to be executed well/effectively– but the speed was a bit more variable here than in the first 400.

4 x 100: Here comes a little speed.  I am not talking about something anywhere near a ‘sprint,’ but this is where I began to add speed, on each 100.  I descended these not only by 100 but within each 100 as well, getting a little added ‘boost’ on each.  I did this by thinking about a faster kick on each flip turn, keeping the turn tight and feeling like I could really kick HARD in the last 25 of each 100.  But I did allow a little slow-down at the beginning of each 100 or I wouldn’t have kept up the speed throughout the whole 4 x 100 “set.”

Lastly- 9 x 50: These are interesting at the end of a race.  I took these breathing basically every 5/every 3 by 50, but I really cranked these out.  I started in my head with “8 to go” by the time I was halfway back on the first 50 (getting a wee bit ahead of myself, eh??).  There’s NOTHING like having fewer than 10 x 50s though– 10 x 50s is a short set- and to be in only single digits really makes it fly by.

Even with the funnny, strange, complicated? or “fun” if you ask me… breakdown, my splits tell a very interesting story. NO change.  Once I hit my stride in the 4th 50, my delta was about  8 tenths of a second! Check it out!

 Ledewitz, Julia 25 JCC-AM Seed: 23.00 Actual: 20:18.00 33.93 36.81 37.72 38.19 38.34 38.27 38.37 38.69   38.63 38.54 38.62 38.82 38.11 38.54 38.52 38.32 37.82 38.36 38.04 38.07 38.20 38.06 37.84 38.39 37.97 38.08 38.08 38.41 38.00 38.32 38.01 37.69

The last 4 x 50s should HURT.  Just expect that it will and it won’t be so bad.  If it doesn’t hurt a little… what’s the point, right?  Why would we race?  Give yourself a little credit- you can do MUCH more than you think you can. I would argue that your brain may be your biggest ‘physical’ limiter.  It’s mine anyway… hence the overly complicated mental game for an otherwise pretty simple activity 🙂

Here’s a fun pic from it!  Shouldn’t be looking “up” as much as I am here, and should probably consider… kicking… at some point, but I think I was coming into the wall (excuses, excuses:).

How about you? any mental games or breakdowns for training, swimming, running… life’s errands?

Quick n Easy Meals!

Posted: March 12, 2012 in Uncategorized

WHOA.  There might be a few posts today, but I wanted to share this one briefly because it’s more plain-jane  information than analysis…  Based on the awesome response to my last post about recipes, I wanted to share several more that I came across, some of which I’ve tried, too! These would be helpful for my time-crunched athlete and non-athlete friends alike.  Most of these are vegetarian, or can easily be made veggie.  Many are also vegan!  Obviously there are unique substitutions you can make yourself, too.  Thoughts/suggestions welcome!

AWESOME NO-COOK MEALS:

  1. Build your own burrito: Choose whole-grain wraps (I’d use corn, for gf purposes), add beans, a sauce, and a handful of at least two veggies.
    • pinto beans, chipotle salsa, mixed greens, chopped red pepper
    • black beans, hoisin sauce, cabbage kimchi, shredded carrots
    • chickpeas, curry sauce, spinach, steamed broccoli
  2. Beans, greens and grains: Saute up some aromatics if you have them, then add your chopped greens. (Try frozen precut greens–no need to add extra water!) Saute until almost tender, season with salt and pepper, then stir in your precooked beans and grains just to heat. Stir and top with hot sauce, nutritional yeast, or even a fancy mustard.
    • black-eyed peas, collards, and barley. Top with smoked paprika and hot sauce.
    • black beans, kale, and quinoa. Top with salsa and chopped avocado.
    • white beans, broccoli, and farro. Add sun dried tomatoes and capers.
  3. A giant salad: Make it a meal by starting with a base of dark, leafy greens. Don’t skimp–at least 3-4 cups. Add a handful (1/2 cup serving) of two or three vegetables, a serving of protein, and something tasty to sauce it up, plus a fun topping. Add a simple whole-grain or serve it on the side.
    • mixed greens with farro, sliced red onion, fennel and shredded carrots, topped with Italian-style tofu, balsamic vinaigrette and chopped olives.
    • Romaine with black beans, bell peppers, grape tomatoes, salsa, and chopped avocado, with baked tortilla chips (Bonus: sprinkle hot sauce)
    • arugula with sliced almonds, grapes, broccoli, with tarragon vinaigrette and a slice of whole-grain baguette
  4. Tofu scramble: Whatever you used to put into omelets you can put into tofu scramble. Scramble medium to firm tofu over medium heat in a pan, then add leftover sautéed vegetables. Serve with toast or roasted potatoes. Cheese on top would be excellent.
    • Spinach, onions and mushrooms
    • Black beans, peppers, and vegan Cheddar
    • Tomatoes, kale and roasted peppers, plus basil
  5. Basic pasta: Most dried pasta is vegan, and it’s easy to find quality tomato sauces without cheese or meat.  Add cooked lentils, crumbled tempeh or seitan Italian sausage to your red sauce and pasta, then top with nutritional yeast. And don’t forget your veggies!
    • lentils, plus steamed spinach, with capers and olives–use a spicy tomato sauce
    • Italian “sausage” with mushrooms and peppers–great for a veg-heavy sauce
    • tempeh with zucchini and carrots, fine for a basic marinara
  6. Burgers and fries: Veggie burgers have come a long way. Find a brand you like, and keep a box on hand for busy nights. Skip the bun and serve over greens, alongside frozen potatoes, which have also come a long way in terms of quality.
    • Black bean burger with spinach, with sweet potato fries and chipotle salsa (ooh, and avocado!)
    • Basic burger over Romaine with tomatoes, onions, and pickle, plus tater tots (you can find natural, vegan ones!) and ketchup and mustard.
    • Indian-spiced burger over steamed kale, with roast potatoes and curry sauce or chutney
  7. Loaded baked potato: I like to consider my starchy sides to be a blank canvas, a way to showcase my creations. Whether you choose white or sweet, pop your spuds in the microwave, then top with a protein, some veg and a sauce. Super easy and filling.
    • Sweet potato with pinto beans, peppers, and spinach, plus pineapple salsa (and nutritional yeast!)
    • White potato with white beans, arugula, and tomatoes, plus pesto
    • Sweet potato with split peas, broccoli and peppers, plus red curry sauce
  8. Cheesy rice and veggies: You don’t have to use rice here; you can use any grain. Add two tablespoons of nutritional yeast per serving, a splash of soy sauce, plenty of pepper, a dab of vegan margarine, and enough unsweetened soy or almond milk to create a sauce. Adjust ingredients as needed. Heat, and serve with your favorite veggies. This is my equivalent of boxed mac-and-cheese. It’s not fancy, they cheese “sauce” is not perfect, but it’s good and tasty. Put a dab of something tasty on top.
    • Farro with Italian vegetables, with pesto.
    • Rice with broccoli and cauliflower, with sriracha.
    • Quinoa with tomatoes and mushrooms, with smoked paprika.
  9. Stir-fry: Otherwise known as “throw whatever’s fresh in the fridge into a pan and call it dinner.” Easy, tasty, fast. Protein + veg + grains on the side. Season to please.
  • Tofu, various veggies in assorted colors and soy-ginger sauce, all over rice
  • Tempeh with carrots, peppers, and broccoli, plus curry sauce and barley
  • Chickpeas with peppers, onions and cabbage, plus millet, with barbecue sauce

10. Tasting plate: You know those nights you’re too tired to cook? This is what you need. If you stand in front of the fridge or in the pantry eating whatever strikes your fancy, you’ll end up eating way more than you planned–with little nutrition.Fill a plate with a handful of each of these: vegetables (preferable 2-3), nuts, fruit, whole-grain crackers, bread or a rice cake. Serve with a little bowl of dip. You’re snacking, it takes two minutes to prep if your veggies are already cut, and you won’t dive face-first into the kettle chips.

    • Celery, carrots, cucumbers, with white bean hummus, sprouted-grain crackers, grapes and almonds.
    • Peppers, cherry tomatoes and jicama with guacamole, a segmented orange, baked tortilla chips, and pecans.
    • Fennel, broccoli, and endive with mushroom pate and wheat crackers, blueberries, and pistachios

This is just a short post based on the fun we all had with my recipes post!!  More recipes keep filtering in, so check it out!!

Today’s topic was instigated by my friend, Jessie, who writes a wonderful life-running blog, you can read here 🙂  After recovering from a serious knee injury and subsequent surgery, she’s feeling a little less than amazingly perfect especially in terms of running.  Oh, how I understand the feeling.  One of her main issues is just that in her recovery process, she’s lost a little of her motivation to get AFTER her running workouts.  It’s not that she doesn’t do them, it’s that the intensity wanes, her enthusiasm then does as well and… as with most running surgeries, her pace is just not quite where it was pre-injury, which is furustrating on all counts.  The other thing about jess… is that she LOVES to run.  She honestly misses the feeling, the high, that running gives her when she isn’t running, so cutting it out completely was simply not an option.  Almost the opposite.. she not only JUST completed a half marathon (after only 6 months of recovery!) but has, yet again, signed up for another!

I understand this feeling of losing motivation though and it’s especially hard when you do in fact need to train.  The worst for her is that running on the tread dreadmill is among her least favorite activities but it’s often the right choice given that it’s softer than road and the road/sidewalks do (on occasion….) get icy/uneven in Boston.   So, I suggested a few things:

1. Give yourself time to RECOVER!  I think Jess suffers from an affliction most athletes I know have– too much time “on” not enough time “off.”  That means that her runs were all only mediocre because she was not well rested or recovered from the last one.

2. One full rest day!  Give the body a break and let it rebuild, every week!  This way, your base pace could be faster each week or 2!

3. Mix it up!! I wrote out some treadmill workouts that I enjoy.  And would LOVE to hear your thoughts/ideas/workouts that make the treadmill a little more enjoyable!

Non-Dreamill ideas:

For all of these- the base pace is the same! Find that easy pace that you could sustain for miles on end (but you won’t have to!) and where I’ve written BP remember that pace.  Don’t make it TOO hard, that’s the tempting ifdea… but you’ll regret it halfway through the workout. On different days, this might vary a little if you’re feeling sore, but try to maintain this BP for 1 month.

1.  40 minute Pyramid (medium intensity): 5 x 6 minutes
10 min. warmup

Set 1: BP (base pace) 1 minute each @ 2, 3 and 4 percent incline
2-3 minutes recovery @ flat jog

Set 2: BP 1 minute each @ 3, 4 and 5 percent incline
2-3 minutes recovery @ flat jog

Set 3: BP 1 minute each @ 5, 6 and 7 percent incline
2-3 minutes recovery @ flat jog

Set 4: BP 1 minute each @ 6, 5 and 4 percent incline
2-3 minutes recovery @ flat jog

Set 5: BP 1 minute each @ 5, 4 and 3 percent incline
2-3 minutes recovery @ flat jog

8 minute cool down

2.  40 minutes Rolling Hills (medium intensity): 5 x 8 minutes

5 x

1 minute BP

2 minutes increase speed by .2

2 minutes increase incline by 2%

2 minutes increase speed by .2

1 minutes recover, flat easy!

Each set can get faster by .1, or increase Incline by 1%.

3. 30 minutes of Intensity!

5 x 5 minutes, warm up and cool down!

Set 1: 1 minute @ Base pace + .4

1minute @ BP + .5

1 minute @ BP +.6

1 minute @ BEST EFFORT!

1 minute RECOVER EASY

(adjust the .4 only after the first set. if that is too easy, pick it up; if it is too tough, drop it to .3)

YOUR turn.  Thoughts?!? Ideas??  Let me know! I’m always on the lookout to make the treadmill a little more… fun?


Hi all (or some, or one… :)!

I’m just back from a quick trip home to Pittsburgh! I went pretty much for one reason– to swim a 1650 race with my mom at an Annual 1650 meet for Masters swimmers across the city.  It was a GREAT trip- full of visits with Carnegie Mellon professors/potential collaborators about my thesis, a dinner party (and cooking for it!) with my mom, a little carpentry work with my brother at a house he’s flipping (it’s AMAZING), and a quick visit with my Dad too!  Whirlwind. I will do a race report on the 1650 but I’m waiting to get some pics from a friend 🙂  Spoiler alert– it went well!

Today, however, I’m going to talk about… food. Noms. Fuel. Whatever you’d like to call it.  Recently, I’ve noticed whenever I post on the twitter about some dish I’ve barely scraped together (that shockingly turns out well) or suggestions I’ve made for friends, people tend to be interested!  Today, a friend of mine was trying to figure out his nutrition and in comparison to his very lackadaisical approach, I realized I could help… just a little.  He, like many of my friends, is fiercely athletic and would do just about anything to ensure that he gets a workout/athletic adventure every 24-hr period. He does not treat nutrition/fueling with the same kind of attention or rigor.  Though he might be an extreme example (as he was actually on the second season of America’s Worst Cooks), I thought I’d pull together a little of the advice I was giving him AND ask for your ideas!  I don’t cook NEARLY enough– I have cereal, prepared foods, soups from a can way too often.  So this is partly sharing, partly asking for advice!

Fundamentally, my “recipes” have a few requisites–

1. Must be easy, simple, not require fancy ingredients
2. Can be saved/reheated easily (fish is bad with this, but I usually try to cook fish in single portions)
3. Must taste decent enough for breakfast when I need to eat leftovers on the run (which is one of my favorite breakfasts)
4. For me, I am pretty much gluten and dairy free (though I do not suggest this approach for anyone who doesn’t have these allergies! This isn’t an athlete-diet idea, it’s that I get sick when I eat these). But in general, foods that are wholesome, not low calorie, just REAL!

So, without further ado, here have been a few of my quick ‘n’ easy dinner/leftovers-for-lunch ideas (please note: these aren’t brain surgery, just a way for me to collect my ideas and moreso- generate some from you in the comments section!!):

1. Stir Fry (obviously…):
Ingredients:

    • Rice/coucous
    • “Sauce”: 1/3 c. chopped onion, 1 clove garlic, crushed, 1/3 c. soy sauce, 2 tbsp. sesame or olive oil, 1 tbsp. honey
    • Frozen bag of “stir fry” or just mixed peppers
    • 2 lbs turkey/chicken tenderloins (cutlets, something cut small, convenience sake) or tofu!
Preparation:
  • Put on your rice/quinoa/couscous (cook according to package 🙂
  • Add onion, garlic, soy sauce, 2 tbsp. oil, 1 tbsp. honey (coat pan) and add turkey or chicken.
  • Saute meat/tofu for 5-10 minutes per side (while you zap your bag o veggies for 30 seconds in the microwave to thaw)
  • Remove meat and saute veggies in the same pan
  • Add cooked couscous, cooked meat to veggie pan. Add sauces (love sesame dressing) or cheese, mix and serve!

2. Turkey Burgers!
Ingredients

  • 1 pound ground turkey breast
  • 2 teaspoons garlic powder
  • 1 teaspoon Cajun seasoning
  • 1/4 teaspoon black pepper
  • 3 tablespoons light gf teriyaki sauce
  • 1 tablespoon water
  • Cooking spray
  • 1 teaspoon olive oil

Preparation

  • Combine the first 4 ingredients in a large bowl. Divide the turkey mixture into 4 equal portions, shaping each portion into a 1/2-inch-thick patty. Combine the teriyaki sauce and water in a small bowl.
  • Place a large nonstick skillet coated with cooking spray over medium heat until hot. Add the onion slices; cover and cook 10 minutes or until onion is golden brown, stirring frequently. Stir in 1 tablespoon teriyaki mixture. Remove onion from pan, and keep warm. Add olive oil to pan. Add patties, and cook 5 minutes over medium heat. Add 3 tablespoons teriyaki mixture to pan. Carefully turn patties over, and cook for 3 minutes or until golden.
  • Note: You can freeze any uncooked turkey patties for up to 1 month. To freeze, separate the patties with wax paper; place them in a heavy-duty zip-top plastic bag, remove excess air, seal, and freeze. Thaw in the refrigerator.

3. Garlic & lemon chicken recipe (tastes like a fancy meal, but is actually super quick and easy)
Ingredients

  • 1/4 cup oil;
  • 8 chicken thighs, with bones and skin;
  • 3 cups onions, sliced thin;
  • 2/3 cup minced garlic
  • 1/2 cup lemon juice;
  • 2 extra lemons, thickly sliced (remove seeds with the tip of a knife) (optional);
  • 1 1/2 cups chicken stock (I keep bouillon cupbes in the pantry to make this super easy);
  • Sea salt and freshly ground black pepper to taste;

Preparation

  • Preheat oven to 350 F.
  • Heat oil in hot (oven-friendly!) pan  and brown the chicken pieces on all sides. It will take about 6 minutes total. Set the chicken aside.
  • Cook the onions until soft, about 3 minutes, and make sure to scrape all the chicken bits off the pan while doing so.
  • Add the garlic and cook for about a minute, until fragrant. Season with salt and pepper at this point.
  • Add the chicken stock, thyme and lemon juice and return the chicken thighs to the pan, skin side up.
  • Bring to a simmer and put the pan, covered, in the hot oven for about 20 minutes.
  • Remove the lid, add the lemon slices (optional but delicious) and bake for another 15 to 20 minutes uncovered.
  • Serve the chicken with the garlic and lemon sauce as well as with some of the lemon slices.

Ok! Your turn!  Thoughts? Recipe Suggestions?  What do you make that is quick and easy? Perhaps even healthy?

ROI- Return on Investment.  Today I’m asking… are you getting all that you could out of your training? Before you start with the typical athlete’s response here “NO! I need to do MORE!!”– take a moment to think.  A coach’s blog today asked this question with important follow-up questions, which I’m going to list here.  Read these and then consider this question again, before you start adding more STUFF to your training regimen, are you really getting everything out of the regimen you have?

According to this particular coach (and hey, just ask mine… and he’d say the same), popular requests include:
• Tips for better nutrition
• Faster/shorter/less recovery
• More strength & conditioning

Most athlete do not ask for …
• More recovery time
• More stretching
• Less training

Now, when an athlete pleads for more stuff to ADD to the schedule, he asks,

“Are you doing what it takes to get the most from your current training?”

For example
If you currently complete 10 hours of training per week and are thinking of gradually increasing the volume to 15 hours these are some questions you might want to ask yourself. (By the way if you are thinking of doing this you ought to have a better reason than just “because that’s what everyone else does” OR “I’m doing an Ironman so I need to do lots of volume”!)

1. Could you increase the amount of quality sleep you get each night
a) Do you get at least 7 hours sleep per night?
b) Is your sleep good quality restful sleep? Again, nope. Woke up at 1am, completely awake, and was up for an hour at least. And that was before my 4:45am alarm…

2. Could you get better quality recovery after each session –
a) Could you introduce power naps to get more rest? Ok, I actually do this. Not after a session, but I LOVE them before. 20 minutes and I’m GOLDEN.
b) Are you able to relax when you aren’t training or do you always find household tasks to do? I’m not bad at this actually. I can sit on a couch for a little longer than I’d like to admit.
c) Do you stretch regularly for at least 15 minutes per time? Working on this! Doing it more and more, it IS helping, it is not a waste of time!

3. Is your nutrition program 100% perfect and suitable for an athlete –
a) do you refuel within 30 minutes of each training session? Not usually. Need to work on this.
b) do you eat a minimum of 5 portions of fruit and vegetables every day? YES, easily.
c) Do you get enough carbs in during your long training sessions? During? Probably not, but I don’t do a lot of LONG workouts right now.
d) If you need to lose weight are you really doing what it takes to alter your nutrition? Not really aiming to lose weight per se, but shift my muscle/fat ratio (as usual).  And no, I’m definitely not doing as much as I could.

4. Are your warm ups effective in each session
a) do you get the full warm up? Almost never! I need to be more patient because a good warm up gives me a MUCH better workout!
b) Do you arrive at training sessions in good time? Usually I set my own schedule, I rarely feel rushed. To be totally honest, I’m more on time for training than I am for anything else 😕 oooops. Sorry friends, professors and collegues!

5. Are your cool downs effective?
a) do you do a cool down?  Cool down? What?  (could use some work :))
b) do you cool down for long enough or do you have to rush of to another commitment? Usually rushing off after…

6. Is your lifestyle conducive to your triathlon goals
a) do you have a lot of stress in your life? Not a lot per se, but I do keep pretty busy…
b) could you reduce your stress at all? Yes, I’m not sure exactly HOW but I know I could…
c) Does your time management allow you to do all of the elements listed above? It would appear not, but I’m not sure how flexible or realistic this whole stress-reduction idea is 🙂


 7. Do you invest much time in developing your mental skills
a) do you include visualisation into your training sessions? No, but I plan to start. I used to do this in swimming and I really liked it. HARD though, takes patience.
b) Are you able to be mentally present (this means being focussed on the task at hand rather than daydreaming) for 100% of the time in each training session? Not daydreaming, necessarily, but I’m usually thinking about the next workout, assignment, work deadline… planning, scheming… much too much. Need to take things 1 at a time.

There are probably many more questions that are pertinent.  How about you?? Any thoughts on these questions and/or answers? Are you doing what it takes to maximise the return on your current training investment??